Let us learn today how to generate a self signed certificate quickly using PowerShell. There are many ways available to do this but using New-SelfSignedCertificate is much easier.
You need to have at least Windows Server 2012/Windows 8 to use this approach. Once the cert is generated you can use it anywhere you want.
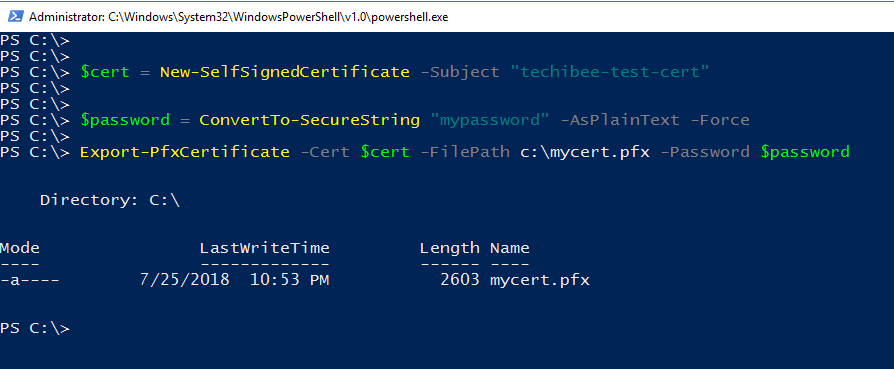
First you need to run below command to generate the certificate. Subject name can be anything of your choice. You can use DnsName parameter if you want.
$cert = New-SelfSignedCertificate -Subject "techibee-test-cert"It creates the cert by default in LocalMachine\MY cert store. If you wish to create in any other store, you can do so.
Now you can export it to a file(PFX format) using Export-PFXCertificate cmdlet. To export the cert, password is mandatory.
$password = ConvertTo-SecureString "mypassword" -AsPlainText -Force Export-PfxCertificate -Cert $cert -FilePath c:\mycert.pfx -Password $passwordThe above command will export the cert in PFX format with password protection and it will be placed in c:\ drive with mycert.pfx name. Change FilePath values if you want to store at different location.
Now you can use this cert for your testing etc.
Below is the screenshot of the execution.
Hope it helps.