≡ Menu

I recently came across a requirement to list the User profiles in remote computer. I can do a quick dir of \\pc1\c$\users to get the list of profiles but that is not efficient. It is quite possible that profiles are placed in different drive/directory. After some research, I stumbled on a WMI class WIn32_UserProfile using which I can get the profiles list I wanted. I read about this class and what it can offer. Interestingly, I can get more details about a profile with this class. I can check if a profile is local, roaming, temporary, random or a corrupted one. This data is useful various scenarios. Also I can check if a profile is a human profile or it belongs to system (that means system is maintaining it — ex: networkservice).

So, the script discussed in this article will help you to get list of user profiles on remote computer and what type of profile it is, profile path (where the profile is stored), and will tell you if the profile is non-system profile or system profile.

One thing I must note here is, Win32_UserProfile WMI class is available in systems greater than Windows Vista/Windows 2008. The previous Operating Systems are not having this class. It means that script will not work for any computers having prior operating systems like Windows 2003/2000/XP, etc.

Script : Get-UserProfile.ps1

[cmdletbinding()]
param (
[parameter(ValueFromPipeline=$true,ValueFromPipelineByPropertyName=$true)]
[string[]]$ComputerName = $env:computername,
[string]$UserName
)            

foreach ($Computer in $ComputerName) {
 $Profiles = Get-WmiObject -Class Win32_UserProfile -Computer $Computer -ea 0
 foreach ($profile in $profiles) {
  $objSID = New-Object System.Security.Principal.SecurityIdentifier($profile.sid)
  $objuser = $objsid.Translate([System.Security.Principal.NTAccount])
  switch($status.Status) {
   1 { $profileType="Temporary" }
   2 { $profileType="Roaming" }
   4 { $profileType="Mandatory" }
   8 { $profileType="Corrupted" }
   default { $profileType = "LOCAL" }
  }
  $User = $objUser.Value
  $ProfileLastUseTime = ([WMI]"").Converttodatetime($profile.lastusetime)
  $OutputObj = New-Object -TypeName PSobject
  $OutputObj | Add-Member -MemberType NoteProperty -Name ComputerName -Value $Computer.toUpper()
  $OutputObj | Add-Member -MemberType NoteProperty -Name ProfileName -Value $objuser.value
  $OutputObj | Add-Member -MemberType NoteProperty -Name ProfilePath -Value $profile.localpath
  $OutputObj | Add-Member -MemberType NoteProperty -Name ProfileType -Value $ProfileType
  $OutputObj | Add-Member -MemberType NoteProperty -Name IsinUse -Value $profile.loaded
  $OutputObj | Add-Member -MemberType NoteProperty -Name IsSystemAccount -Value $profile.special
  if($UserName) {
   if($User -match $UserName) {
    $OutputObj
   }
  } else {
   $OutputObj
  }
 }
}

Output:


By default the script gets you all profiles in the computer. If you are looking for the details of a specific profile, just use the -UserName Parameter. For example, to get the profile of LocalUser1, use .\Get-UserProfiles.ps1 -UserName localuser1

Similarly to get the profiles on remote computer, use -ComputerName parameter. See below image for examples.

In my next post I will write about how to delete windows user profiles using powershell script and Win32_UserProfile WMI class.

{ 10 comments }

Microsoft TechEd India 2012 Live

If you are in INDIA and cannot attend TechEd 2012 for some commute or any different reasons, there is an opportunity for you to attend all TechEd sessions from your desk itself. Microsoft has made TechEd India 2010 online to busy admins and tech enthusiasts. All you need to do is visit below link and register yourself.

https://india.msteched.com/TechEdLive

You can follow all TechEd India 2012 sessions include keynotes, demos, etc.

If you find any session interesting for System administrators, then please do share the details in comments sections so that others can follow it.

Hope this helps…

{ 0 comments }

Exchange 2010: Free online training videos

The author of exchangeserverpro.com announced a free Exchange 2010 training program. This is very useful to people who are willing to learn exchange 2010.

The training sessions contains mainly 4 modules which includes text, images, and videos.

  • Module 1 – Get started by creating your own Exchange 2010 training lab environment
  • Module 2 – Walk through the configuration of each of the Exchange 2010 server roles
  • Module 3 – Become familiar with managing recipients with the Exchange 2010 management tools
  • Module 4 – Learn how to backup and restore an Exchange 2010 server

This course is mainly targeted to the beginners who want to lean exchange and to people who has some moderate level of knowledge. Out of everything, this is a FREE course, so anyone can attend by just subscribing to the course online.

For more information and registration about this course, please visit the Paul’s website: http://exchangeserverpro.com/training/

Hope this helps.. and happy learning….


{ 0 comments }

SQL Server: Collection of FREE ebooks

Given the feedback I received for my Powershell free e-books collection, I want to do similar thing for other technologies that I go through. As part of that, I am starting this post to list all SQL related free ebooks, materials, videos, etc.

I will keep updating this list with resources as and when I find then. Please subscribe yourself to either my twitter updates(@pamarths) or subscribe to RSSto stay tuned.

If you come across any other free resources that are worth sharing with everyone, please either provide the link in comments section or just email me.

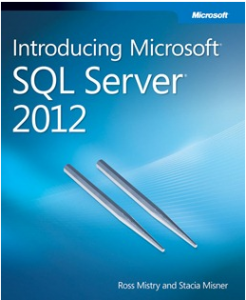
Book#1: Introduction to SQL Server 2012

Download Link: http://blogs.msdn.com/b/microsoft_press/archive/2012/03/15/free-ebook-introducing-microsoft-sql-server-2012.aspx

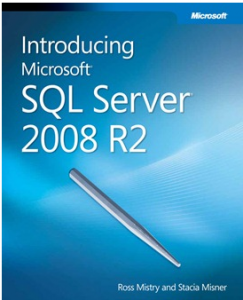
 Book#2: Introducing Microsoft SQL Server 2008 R2

DownloadLink : http://blogs.msdn.com/b/microsoft_press/archive/2010/04/14/free-ebook-introducing-microsoft-sql-server-2008-r2.aspx


{ 2 comments }

5 Tips to Improve Your Web Security

The technologies used to improve your company’s web security have evolved significantly since the days of proxies and lists. Web security software can include several complementary technologies which help to secure your network, protect your users, and protect your company. As a suite of technologies, web security software covers all the risks that can come about from employees accessing the Internet. Here are five tips to improve your web security.

1.     Protect users from malware

Web security software can scan downloads and webpages for malware, protecting your users from malicious content. Using multiple scan engines from different antivirus vendors boosts your protections to the next level.

2.     Block access to phishing sites

Web security software can block access to phishing sites, protecting your users and your company from data loss that could result if a user enters confidential information into a site they believe is legitimate.  This enhances the protection provided by your email filtering software and also protects users from legitimate seeming search results.

3.     Block access to compromised websites

Legitimate websites are compromised every day, and web security software can protect your users by blocking access to those sites. Web security software uses lists that are updated multiple times per day, ensuring that your users are protected even before you read about the latest compromise on your favorite news site.

4.     Prevent accidental access to inappropriate material

There are sites on the Internet that just aren’t going to meet your acceptable usage policy. Web security software can block access to these inappropriate and offensive websites, stopping things before policies are violated. You can also enforce the “safe search” options in popular search engines, further protecting your users from accidental policy violations.

5.     Mitigate legal liability

Web security can help mitigate legal liability in several ways, which ultimately contributes to your web security by ensuring availability.

a.      Logging

Web security software can log all access, making anonymous or restricting access to personally identifiable information while still enabling you to prove whether another web site was accessed or not. When necessary, or as permitted by law, individual access can be attributed to a user, but log aggregation also protects users’ privacy.

b.     Media

Web security software can also restrict access to media files that can contain copyrighted material, and block access to the sites that are sources for pirated material, preventing users from downloading content that could expose the company to legal liability.

Taking advantage of some or all of these five ways to improve your web security is a great way to improve the overall security posture of your network, protect your users, reduce lost productivity, and ensure that you can continue to provide Internet access for your users. None of these requires you to play the “Internet police” role or to do anything users might consider as a violation of their privacy, which is good for employee morale as well as security.


This guest post was provided by Casper Manes on behalf of GFI Software Ltd. GFI is a leading software developer that provides a single source for network administrators to address their network security, content security and messaging needs. Learn more on what to include in your web security strategy.

All product and company names herein may be trademarks of their respective owners.

{ 0 comments }

The purpose of this post is to share free resources that are available in internet to learn Powershell. I feel this information is very useful to newbies’ who are willing to learn this power scripting language.

The books listed here are neither in the order I recommend reading them nor based on the worthy content they have. It is just a random listing and each one is having its own significance and importance. The list I am including here is completely free and you can download them(may be some needs registration). Also this is not the final list, I will keep adding the content when even I find it. Please subscribe yourself to either my twitter updates(@pamarths) or subscribe to RSS to stay tuned.

If you come across any other free powershell resources that are worth sharing with everyone in PS planet, please either provide the link in comments section or just email me.

Book#8: Secrets of Powershell Remoting

Secrets of PowerShell Remoting

Download Link: http://powershellbooks.com/SecretsOfPowerShellRemoting.zip

Source: http://powershellbooks.com

 Book#7: Administrator’s Guide to Windows PowerShell Remoting

Download Link: http://powershell.com/cs/media/p/4908.aspx

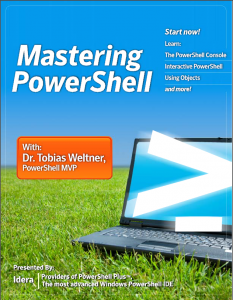
Book#6: Mastering Powershell

Download Link: http://powershell.com/cs/blogs/ebook/

This is one of my favorite online resources for learning powershell.

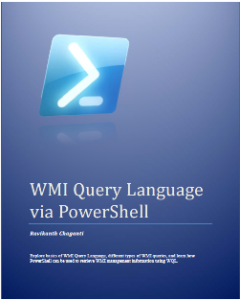
Book#5: WMI Query Language(WQL) Via Powershell

Download Link: http://www.ravichaganti.com/blog/?page_id=2134

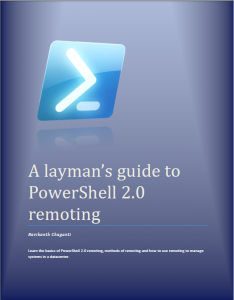
 Book#4: Layman’s Guide to Powershell 2.0 Remoting

Download Link: http://www.ravichaganti.com/blog/?page_id=1301

Book#3:  Effective Windows Powershell

Download Link: http://rkeithhill.wordpress.com/2009/03/08/effective-windows-powershell-the-free-ebook/

Book#2: The Administrator Crash Course: Windows PowerShell v2

Content: It contains crash course material for learning Powershell in 4 weeks.

Download Link: http://nexus.realtimepublishers.com/accwp.php

Book#1: Windows Powershell Workbook : Server administration

Content: Introduction to Powershell and performing Administrative tasks with it.

Download Link: http://download.microsoft.com/download/4/7/1/47104ec6-410d-4492-890b-2a34900c9df2/Workshops-EN.zip

Source : http://blogs.technet.com/b/chitpro-de/archive/2008/02/28/free-windows-powershell-workbook-server-administration.aspx

More coming up….


{ 3 comments }

Powershell: Create new mailbox database

After installing MS Exchange 2010 in my test lab, I want to create new mailbox database in my server. While I can do it with GUI, I am more interested in exploring the powershell way…

The exchange management shell is having very large set of cmdlets to manage exchange. In fact the GUI also is a wrapper on top of Powershell commands. So learning these commands and using them in daily operations is really useful and you can go into granular details.

New-MailboxDatabase is the cmdlet that accomplished my task here.

New-MailboxDatabase -EdbFilePath C:\Database\MailboxDB1.edb -Server TIBDC1 -Name MailDB1

Here I am creating a new mailbox database with name MailboxDB1 and placing the EDB file C:\Database folder with MailboxDB1.EDB file name. You might ask what happens to log files and where they will be saved. By default logfiles go with EDB file unless the path is specified with -LogFolderPath parameter. The -Server parameter specifies the server name where this database is going to be created.

You won’t see the creation of EDB file or logfiles in the given folder unless you mount it. So we need to use Mount-Database cmdlet to mount the newly created database. You can use the below command for that purpose.

Get-MailboxDatabase -Identity MailDB1 | Mount-Database

Hope this helps… and you will see more exchange stuff in my upcoming posts.


{ 0 comments }

Once MS Exchange was my favorite technology. I loved each and everything I did and learned in Exchange. I think the same kind of era has started again for me as I decided to get good knowledge on Exchange 2010.

As part of that, I enhanced my test lab to include Exchange 2010 servers. The installation of Exchange 2010 on Windows 2008 R2 is very straight forward. To be honest, it is matter of few clicks if you know exactly what needs to be done.

The further content of this article will give you the step-by-step procedure for installing Microsoft Exchange server 2010 with SP1 on Windows 2008 R2 Operating System. I am going to install mailbox, client access, and hub transport roles on a single server.

Before you start the installation, make sure that you met the following pre-requisites.

  • Active Directory forest functional level should be Windows Server 2003 or above
  • Active Directory schema master FSMO role is running on a DC with Windows 2003 SP1 or higher version of OS
  • Exchange Server needs a set of windows features to be installed as pre-requisite. This list differs with the Exchange Role(s) you are trying to install. For the installation of mailbox, client access, and hub transport role on the same box, use the below powershell command.
Import-Module ServerManager            
Add-WindowsFeature NET-Framework,RSAT-ADDS,Web-Server,Web-Basic-Auth,Web-Windows-Auth,Web-Metabase,Web-Net-Ext,Web-Lgcy-Mgmt-Console,WAS-Process-Model,RSAT-Web-Server,Web-ISAPI-Ext,Web-Digest-Auth,Web-Dyn-Compression,NET-HTTP-Activation,Web-Asp-Net,Web-Client-Auth,Web-Dir-Browsing,Web-Http-Errors,Web-Http-Logging,Web-Http-Redirect,Web-Http-Tracing,Web-ISAPI-Filter,Web-Request-Monitor,Web-Static-Content,Web-WMI,RPC-Over-HTTP-Proxy -Restart

This completes the pre-requisites setup/installation. Now we can move on to actual installation.

Step-by-step installation instructions:

  • Download Exchange Server 2010 SP1 x64 version from MS site and extract the contents to a folder — say c:\local\ExchangeInstallation on Windows 2008 R2 Server where you want to install Exchange Server.
  • Now go to c:\local\ExchangeInstallation folder and click on setup.com file. This brings up the Exchange server installation wizard. Here, choose the language options as you need and click on “Step 4: Install Microsoft Exchange”
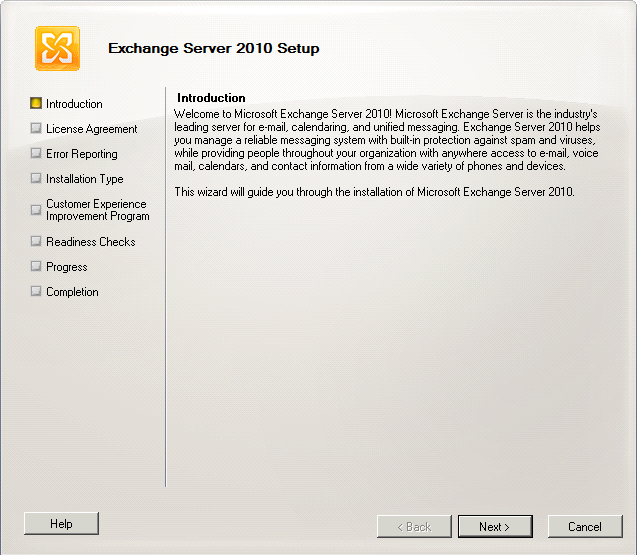
  • Click Next on the introduction page


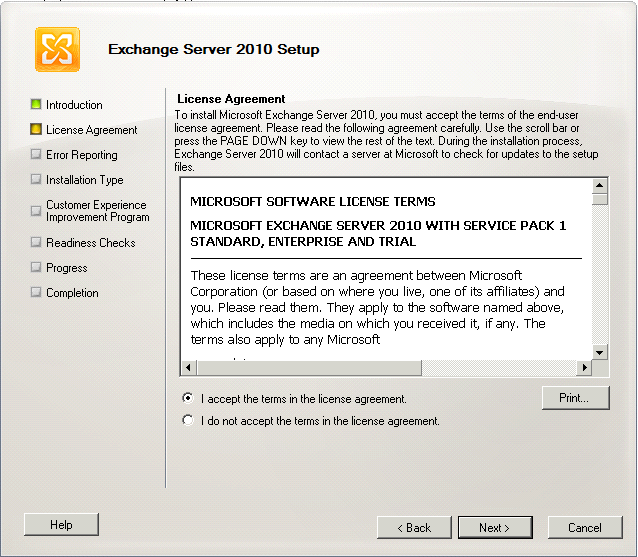
  • Accept the license agreement and click Next— otherwise you can’t proceed


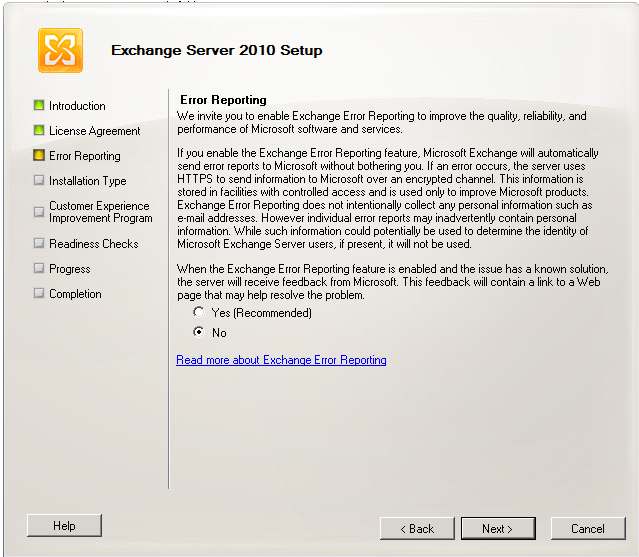
  • Make your choice at the Error Reporting wizard and click Next


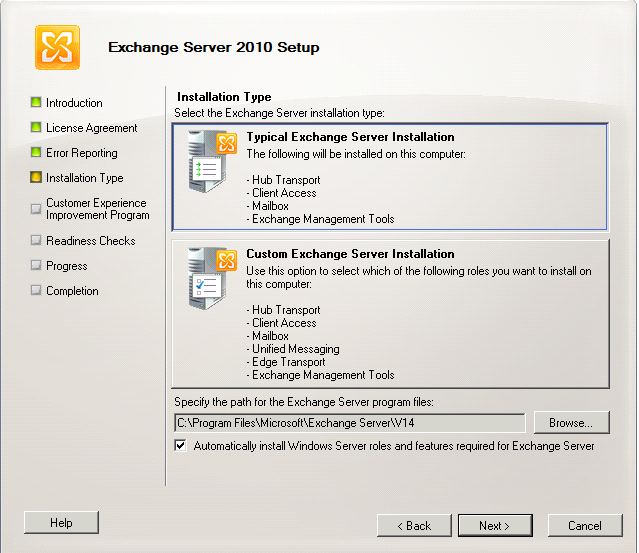
  • Select the type of installation you want to do in the Installation Type wizard. You can either choose Typical Exchange Server installation which will install Maibox, Client access, and hub transport roles or choose the custom installation where you can install any combination of selected roles. In this page, you can one useful option Automatically install Windows Server roles and features required for Exchange Server. This means that setup will automatically install the required features and roles based on your choice of installation. If you miss to follow the feature and roles installation step in pre-requisites section, then you can select this check box.


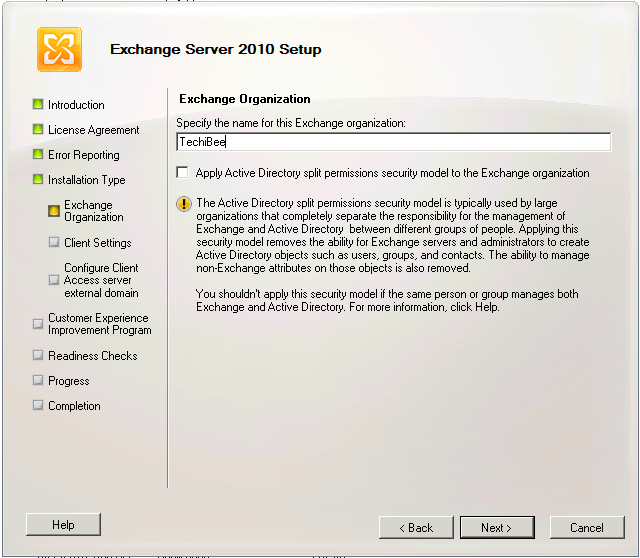
  • In the Exchange Organization wizard, enter a name for the new exchange organization that you are going to install. In my case, I named it as TechiBee.


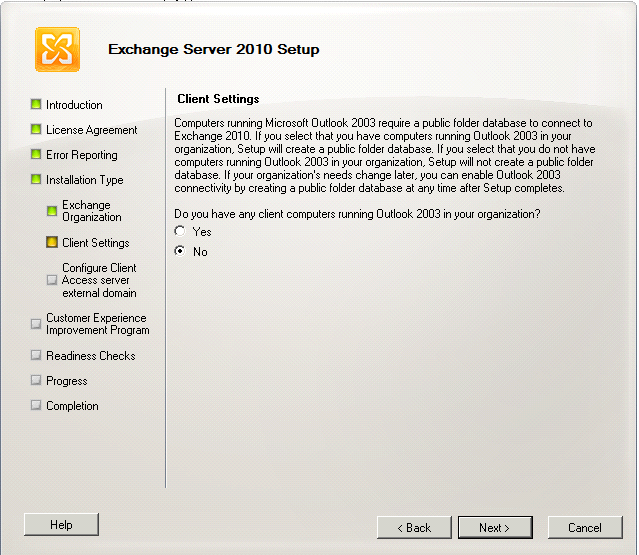
  • Click NO on the Client Settings wizard and proceed if you don’t have any outlook 2003 clients in your organization that need to talk to Exchange 2010 servers.


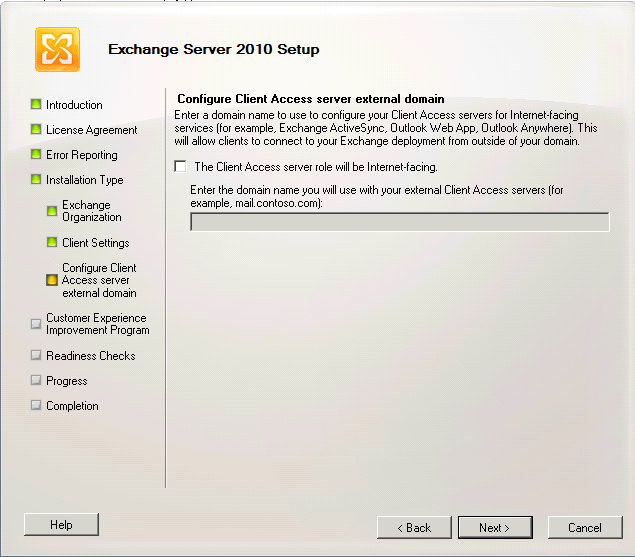
  • Leave the defaults and click Next  at Configure Client access server external domain wizard. You can do this later if you want your client access server to act as external OWA server.
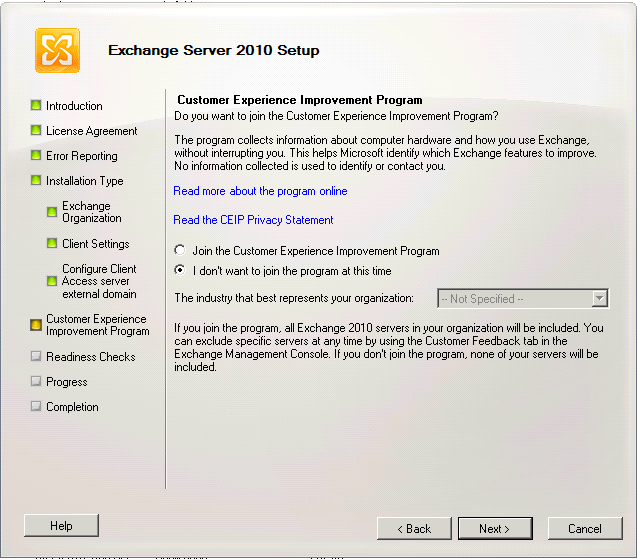
  • Make your choice on Customer Experience Improvement Program and click Next
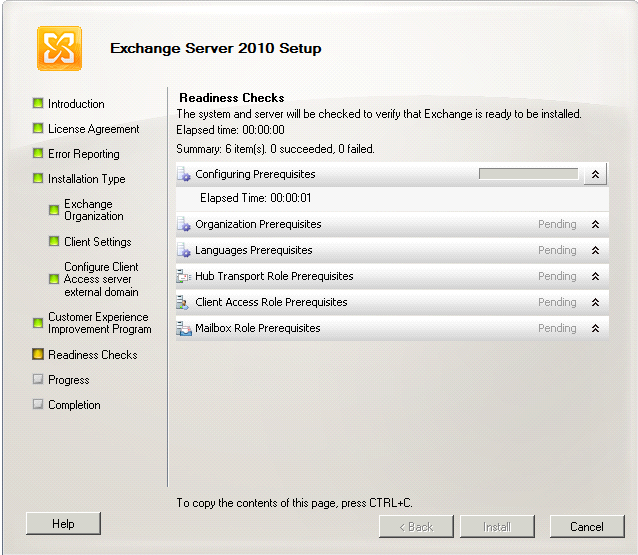
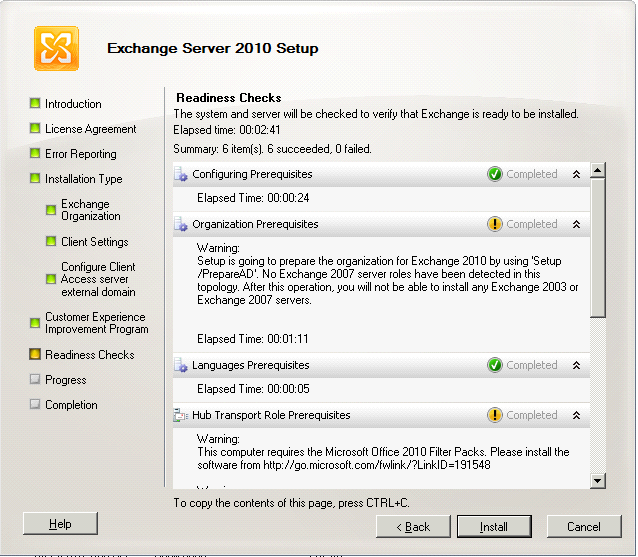
  • Well, it is time of Readiness checks, all you need to do here is wait for the readiness checks to complete and review/fix the errors if it reports any. In my case it warned me to install Office 2010 Filter packs. Click Next to proceed to the actual installation stage where the setup will install required binaries for your exchange organization.
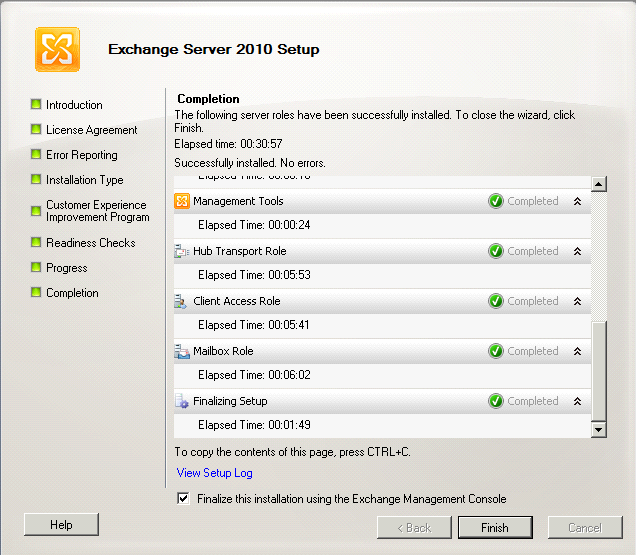
  • This Completion wizard will take more time depending on the no. of roles you are installing. Be patient and wait for to complete. Once you see everything in green, click on Finish to complete the Exchange Installation.
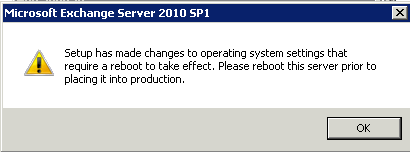
  • The setup might ask you to reboot your computer. I prefer you do it before you change any other settings on the server.


This completes quick setup of Mailbox, Client access server and hub transport server roles. Hope this helps and feel free to post any questions if you have.


{ 0 comments }

One of my old friend/colleague called me to day for a small help. He is looking for script to get the list of active directory groups that a computer account is member of. Since this is a very basic requirement every System administrator will get, I wanted to post it in my blog.

So, the code described in this post uses Quest Active Directory powershell cmdlets. I can code using the dotnet objects or built-in activedirectory module in windows 7/2008 as well but since I wanted to make it more generic, I opted for Quest cmdlets. Another advantage is that even newbies can query AD with these tools efficiently.

Since I am using Quest AD cmdlets, you should down load them from http://www.quest.com/powershell/activeroles-server.aspx and installed it on your computer. After installation, copy the below code into a file called Get-ComputerGroups.ps1 and run it from Quest AD shell(you can launch this from program files), as shown below.

Get-ComputerGroups.ps1

[cmdletbinding()]
param(
[parameter(mandatory=$true)]
$ComputerName
)            

$Groups = (Get-QADComputer -Id $ComputerName).Memberof            

$Groups | % {
$_.split(",")[0].Split("=")[1]
}

Usage:

[PS] C:\temp\Get-ComputerGroups.p1 -ComputerName MyPC1

Here -ComputerName parameter is mandatory.

Similarly, if you want to provide the computer names from text file and get the active directory group names of all of them, then use the below code.

Get-ComputerGroups.ps1

[cmdletbinding()]
param(
[parameter(mandatory=$true)]
$FilePath
)            

$Computers = Get-Content $FilePath
foreach ($ComputerName in $Computers) {
    write-host "$ComputerName is memberOf following Groups"
    $Groups = (Get-QADComputer -Id $ComputerName).Memberof
    $Groups | % {
    $_.split(",")[0].Split("=")[1]
}            

}

Usage:

[PS] C:\> Get-ComputerGroups.ps1 -FilePath c:\temp\Computersfile.txt

If you want to redirect the output to a text file, just try the below command.

[PS] C:\> Get-ComputerGroups.ps1 -FilePath c:\temp\Computersfile.txt | Out-File c:\temp\output.txt

The output will be written to output.txt file.

Feel free to comment here if you have any doubts.


{ 4 comments }

Ever since Windows 8 consumer preview is out, I wanted to upgrade my Home PC. Given I have only one PC, it has some softwares which I use regularly. If some of them not working, then I can do nothing but reverting old OS. That is a waste of time and efforts. I need to install every thing again on after rebuilding with XP/Windows 7 OS.

So, Isn’t it nice if there is a place which can tell me a software or device is compatible with windows 8 Beta? I use software like Nero, VLC player, iTunes and many others on my current home PC and would like to know if they are compatible with windows 8 so that I can consider migrating.

Hurry… There is a way out there…. MS has given a online facility where you can just type in your software or device name to find out the compatibility. In some cases you may need to upgrade the version of software which is totally fine.

I did search for my wish list of softwares that I want to move to windows 8 and go the results I need. You can also do it by visiting below URL to verify the compatibility of your software or devices like printers, mobile devices, gaming devices etc. The list that is given in the website seems to be huge and covering most applications and devices that a normal user need. Don’t look for software you developed or has got it developed. No surprise you won’t see them in the list 🙂

http://www.microsoft.com/en-us/windows/compatibility/en-US/CompatCenter/Home


Hope this helps… Happy evaluation…

{ 1 comment }